Wireless hidden camera networks, using Wi-Fi or cellular connections, offer modern home security with remote access and real-time monitoring via internet devices. High-quality hardware with advanced infrared technology and HD resolution is crucial for clear surveillance in low light. Setting up requires strategic planning, including optimal placement and secure network configuration. Prioritize security with robust encryption and access controls to protect private footage. Regular testing ensures optimal performance, especially for night vision capabilities.
Uncover the power of wireless hidden camera networks for enhanced home security with our comprehensive guide. Learn how to deploy a network of discrete ‘hidden nanny cams’ equipped with night vision for constant surveillance. This step-by-step tutorial covers everything from selecting robust hardware to setting up your network, configuring access controls, and optimizing performance. By the end, you’ll have a reliable system in place, ensuring peace of mind around the clock.
- Understanding Wireless Hidden Camera Networks
- Choosing the Right Hardware for Nanny Cams with Night Vision
- Setting Up Your Network: A Step-by-Step Guide
- Configuring Security and Access Controls
- Testing and Optimizing Your Wireless Hidden Camera Network
Understanding Wireless Hidden Camera Networks
Wireless hidden camera networks, often referred to as home security systems or surveillance setups, are a modern solution for monitoring and recording activities in and around your property. These networks typically consist of multiple wireless cameras connected to a central control unit, allowing for remote access and real-time monitoring via internet-enabled devices. One popular application is the use of hidden nanny cams with night vision capabilities, offering peace of mind for parents or caregivers by enabling them to discreetly observe children’s activities.
These camera networks leverage wireless technology, such as Wi-Fi or cellular connections, to transmit video feeds and control signals over long distances without the need for complex wiring. This flexibility enables easy placement of cameras in hard-to-reach areas, ensuring comprehensive coverage while maintaining a low profile, especially when used as hidden nanny cams. Night vision functionality further enhances their effectiveness by capturing clear images even in low-light conditions.
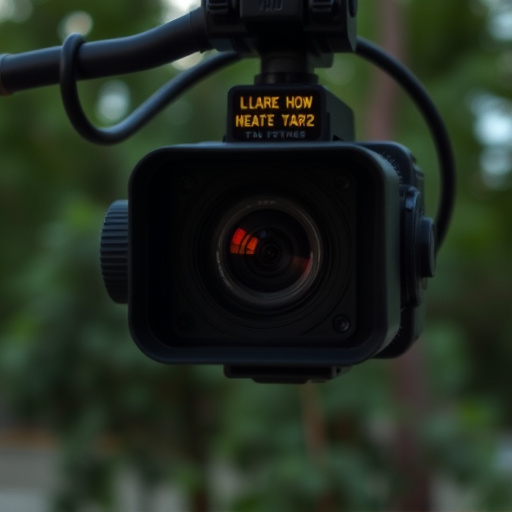
Choosing the Right Hardware for Nanny Cams with Night Vision
When setting up a network of hidden nanny cams with night vision, selecting the appropriate hardware is paramount to achieving clear, reliable video surveillance, especially in low-light conditions. Look for cameras equipped with high-quality infrared LEDs or arrayed IR sensors that can penetrate darkness and offer consistent performance even after sunset. These hidden nanny cams should also feature a good resolution (HD or higher) for crisp visuals during the day and at night.
Additionally, prioritize hardware with stable wireless connections. Choose cameras with dual-band Wi-Fi capabilities, which offer faster speeds and more reliable signals compared to single-band options. A robust wireless network ensures smooth video streaming and real-time monitoring, eliminating lag or signal dropouts that could disrupt your peace of mind when keeping an eye on loved ones or valuable assets.
Setting Up Your Network: A Step-by-Step Guide
Setting up a wireless hidden camera network, particularly for applications like monitoring with hidden nanny cams featuring night vision, involves careful planning and execution. Start by selecting high-quality cameras equipped with reliable wireless signals and night vision capabilities to ensure clear images even in low-light conditions. Next, identify strategic placement locations within the area you wish to monitor—considering factors such as coverage, line-of-sight, and potential obstructions. Once determined, mount your hidden nanny cams discreetly for optimal viewing angles.
After installing the cameras, connect them to a central hub or router using the provided wireless network setup process. Ensure each camera is assigned a unique network name (SSID) and password for secure access. Configure your devices to operate on the same channel for seamless communication between cameras. Test the network’s stability by moving between different locations within the monitor area, ensuring consistent signal strength and video feed quality.
Configuring Security and Access Controls
When setting up a wireless hidden camera network, especially for applications like nanny cams with night vision, configuring robust security and access controls is paramount. Start by choosing a reliable encryption protocol like WPA2 or WPA3 to secure your Wi-Fi network. This ensures that the video feed from your hidden cameras remains private and cannot be easily intercepted.
Next, utilize strong, unique passwords for both your router and each camera’s access point. Consider setting up a guest network to isolate the hidden cameras from other devices in your home, enhancing overall security. Additionally, implement access controls to restrict who can view the live feed or access recorded footage. This could involve using a dedicated app that requires a password or biometric authentication for entry, ensuring only authorized individuals can monitor your hidden nanny cams’ night vision.
Testing and Optimizing Your Wireless Hidden Camera Network
After setting up your wireless hidden camera network, it’s crucial to test its performance and optimize for best results, especially if you’re using hidden nanny cams with night vision capabilities. Start by ensuring each camera connects smoothly to the central hub or base station, and verify signal strength across all devices. Test video quality, including resolution and frame rate, to ensure they meet your expectations. Night vision should be sharp and clear, allowing for detailed surveillance even in low-light conditions.
Next, consider range and interference. Move cameras around to find the ideal placement that offers maximum coverage without signal drop. Avoid obstacles like walls or large metal objects that can interfere with wireless signals. You may also need to adjust network settings, such as channel selection, to minimize interference from other nearby networks, ensuring smooth and uninterrupted video transmission.
Setting up a wireless hidden camera network for monitoring with features like night vision can seem complex, but with the right hardware and clear guidance, it becomes an achievable task. This guide has walked you through choosing suitable components, setting up your network, configuring security, and optimizing performance for your hidden nanny cams equipped with night vision capabilities. By following these steps, you’ll be able to create a secure, efficient system tailored to your needs.